Blog

Nourish – May 2020

Winter Sowing Progress Report

By Tamara Premo, Extension Master Gardener

Now that the weather is getting warmer (well somewhat warmer), I thought I’d give you an update on my winter sown seeds.  I only planted half as many milk jugs this year, because I’m focusing on developing my flower beds and cutting back on some veggies.  I’ll have to get those at the Farmers Market.  Below is a picture of what I’ve done this winter, mostly planted in early March.

In the next photo you can see that I’ve used several sizes of milk jugs and some clear plastic orange juice containers.  Personally, I think the clear plastic containers work better since they get more sunlight.  Also those pill containers tied to each jug contain the seed packet. They are waterproof and I don’t have to worry about my permanent ink pen washing off during the winter…like it did last year.  (I had to wait for some jugs to start blooming because I had no idea what was planted!)

As May starts to get closer I start checking my jugs every other day, mostly to make sure they don’t dry out, and to see if anything is sprouting.  This is my favorite part of winter sowing.  Yesterday I had 11 jugs with sprouts.  The photo below is one of my Bachelor Buttons, always the first to sprout.  Some other varieties that are showing are Dwarf Morning Glories, Zinnias, China Asters, Penstemon and some Speedwell seeds I harvested from my plants last year.

I noticed that my soil was dry on top but the soil in the bottom of the jugs was still damp.  We’ve had several windy days and no snow or rain to keep things wet.  I just took my gallon sprayer jug and gently sprayed the top of the soil in each jug.  You might think that the seedlings would die with our nights below freezing, but the jugs act as mini greenhouses and everything was fine when I checked them today.To illustrate how effective this system is, the next photo is my Agastache -Autumn Sunset.  I grew it as an annual last year because I live in Zone 4b.  It didn’t start sprouting until late July so it never flowered.  And I never got it into the ground!  So this plant lived in this jug all winter and to my great surprise it’s coming back and I’m thinking it will be a perennial for my garden.  My point in telling you this, is sometimes you will think nothing is going to happen with your seeds, but trust me they will germinate when it’s right for them.  Two years ago I planted pink lavender and never saw a seedling all season.  I kept them watered and kept them with my seedlings for next season and sure enough, they germinated and are growing well in my flower beds.

Tomorrow I will start my vegetables (shallots, bunching onions, cabbage, zucchini, and squashes).  Unlike some perennials that need a period of freezing and thawing (stratification), I start these veggies now to get a jump start on my growing season.  By the time the last week in May gets here (my time to plant) the plants will be about 5” or 6” tall.  If you have an empty milk jug and some seeds, try this method, it’s not too late.


Beautify – May 2020

Contents (Click on a title or scroll)

Speaker event ‘Hot Plants for 2020’

Doing the Chelsea Chop


Speaker event ‘Hot Plants for 2020’

By Michele Worden, Advanced Extension Master Gardener, MGANM President

We were nervous about how our first online presentation would work, so Robin Smillie and I entered the Zoom room 15 minutes early.  Much to our surprise – so did many other people!  Thus, for 15 minutes Master Gardeners had our usual social time before the speaker presentation.  We chatted and caught up.  How was handling the pandemic going at your house?  Many of us marveled at seeing so many faces at the same time.  It was a bit like coming out into the sun from a dark place.  We could not remember the last time it had happened.  We blinked.  We were giddy.

At 6:01, Robin Smillie of Garden Goods began her presentation. She regaled us with an overview of the green industry and how many plants Garden Goods sells in a season.  It was very interesting.  So far, they had only received balled and burlapped fruit trees.  They were Tibetan cherry trees (Prunus serulla) with decorative copper bark that provided an attractive winter interest and beautiful spring bloom.  She showed us a picture of the tree in a landscape and we oohed and ahhed.  

Robin proceeded with a beautiful Powerpoint presentation of plants Garden Goods was excited to be getting for 2020.  All plants had already been trialed in northern gardens by Garden Goods.  They test plant introductions for at least one season by planting at the owner’s home, or key places, to evaluate before they offer larger numbers to the public through their store.  I texted her to claim a few that I wanted for my garden during the presentation.  They will have very limited supply.   Best to get ahead of the curve.


The list Robin talked about are below:

Shrubs and roses

Hydrangea paniculata ‘Firelight’

Hydrangea macrophylla ‘Summer Crush”

Petite ‘Knock-Out’ rose (a series)

Prunus Serulla


Perennials

Aralia cordata ‘Sun King”

Allium ‘Millineum’ (weird spelling)

Brunner macrophylla ‘Jack of Diamonds’

Astilbe ‘Chocolate Shogun’


Doing the Chelsea Chop

By Nancy Popa, Extension Master Gardener

Did you ever hear of the Chelsea Chop?  It is not a dance or a recipe but rather a pruning technique to make your garden spectacular. The Chelsea Chop is named for the pruning technique that is carried out right before the Royal Horticultural Society Flower Show in Chelsea England.  The technique limits the size of the plants and controls the flowering season of many herbaceous plants.  It also prevents tall leggy plants from toppling over by making them bushier.

Many summer and autumn flowering plants are suitable for the Chelsea Chop.  Sedum (upright), Solidago, Aster, Phlox, Achellia, Penstemon, Helenium, Leucanthemum and Echinacea are perfect candidates.   It is not suitable for plants that only bloom once during the season such as Peonies, Iris and Aquilea.  It is not used in woody plants nor plants that are young or undeveloped.

Plants can be cut back by one-third to one-half when they are nice and green (anytime beginning in late May/early June) using pruners or scissors.  You can actually prune them several times throughout June, just make sure that your pruning is done by the summer equinox at the end of June, as the shortening days signal the plant to produce seeds and not flowers.  

Prune back close to a bud, where the growth-hormones will aid in the production of new branching and buds. Remember, the terminal bud (the bud at the end of a branch or twig) produces a hormone called auxin that directs the growth of lateral buds (buds along the side of the branch or twig). As long as the terminal bud is intact, auxin suppresses the growth of lateral buds and shoots below the terminal. When you remove the terminal bud by pruning, lateral buds and shoots below the pruning cut grow vigorously.

Make sure you keep the plant watered and fertilized following the pruning as it can shock the plant.  

You can cut back the entire plant if you want to delay the blooms to coincide with another flowering plant or you can cut back every other stem so that you extend the blooming time.  A word of caution; make sure you deadhead the first flush before it sets seeds, otherwise you will be disappointed by the intensity of the second flush.  In the end, the plant may be slightly shorter although sturdier and with numerous blooms, which may be smaller.  Expect blooms to be delayed by about 2 weeks.

It sounds like a great science project, especially if you are trying to time the blooms to coincide with another species.  Get out your journal and document your work!


Serve – May 2020

Victory Garden Emergence

By Tamara Premo, Extension Master Gardener

Victory gardens are back in vogue as more people are looking to grow their own food in response to the COVID-19 pandemic.  The Victory Garden movement began during WWI in an effort to get more Americans to grow their own food to allow more food to be exported to support our European allies, where the food would go to both civilians and troops. The European farmers were recruited into the military and many of their farms became battlefields. According to history.com, over 8 million gardens were created in America by 1918!  

There was a resurgence of Victory Gardens during WWII when, once again, much of the commercial crops were being exported to support the war effort. Maintaining a Victory Garden was seen as a citizen’s patriotic duty and it helped families stretch their rationing stamps.  Even Eleanor Roosevelt planted a Victory Garden on the White House lawn. 

Victory Gardens were so popular that they continued well beyond the last world war. In 1975, a new gardening television program debuted on PBS called, “The Victory Garden”.  Initially more of a demonstrational presentation, the show eventually expanded to include guests and special features on travel. The show was so well received that it was the oldest gardening program in television history, airing until 2010. Within the same spirit, the series “Edible Feast” continues to air on PBS as a revamp of the original program.

I heard about Victory Gardens 2 on Facebook and I was curious to know if this was a reaction to the COVID pandemic. I joined a FB group called Victory Garden Revival. There is also a group called Victory Gardens for Northern Michigan. The day I joined VGR, there were ~7500 members and 4 days later there were ~11,000 members.  Obviously, there is a movement to get back to growing our own food.  I asked what motivated members to start a Victory Garden and it was heartening to hear that in addition to feeding their families, most were planting more to help feed their neighbors and to help local food banks and soup kitchens.  There were a lot of new gardeners looking for advice, some people were turning part of their lawns into gardens and some were forming cooperatives in their cities.

Since I’ve had more time with the stay at home order, I’ve been able to create more garden beds and plan to grow more vegetables for preserving.  I noticed that my neighbor created a new garden on the side of their yard to grow and preserve as much food as they can so they aren’t caught short again.  Several weeks ago, I also started growing lettuce and spinach indoors because finding fresh produce at my local grocery store was hit or miss, with mostly empty shelves.  I’ve become more frugal by re-growing some of the vegetables I buy, like green onions, celery and carrots. Like my neighbors, my gardening efforts help safeguard me against a future food shortage of my own. I hope to use this experience to educate others as our country slowly phases into some sort of normalcy.

Master Gardener groups across the country are giving Victory Garden workshops and online seminars.  Perhaps this is something we can all get involved with by delivering to 4-H groups and outreach events like Smart Gardening and the MG Booth.

In wartime efforts, those who maintained a Victory Garden served the cause. Victory Gardens served a real purpose then, and although the circumstances are different today, we have been fighting an invisible war. While it’s true there is no burden on commercial farmers to feed people overseas and it might not be your patriotic duty today, as it was in war time, but there is a certain sense of security that comes with growing your own food. There is a sense of community when you grow food for others.  Especially those who cannot produce food for themselves. Gardeners help others by growing and giving.


Coordinator’s Corner, May 2020

Coordinator’s Corner: How to Volunteer While Staying Home and Staying Safe

By Nate Walton, MSU Extension Consumer Horticulture Instructor and MG Coordinator

Many of you will already be aware that MSU Extension Master Gardener Volunteers and Trainees are not being required to complete their volunteer hour requirements for certification in 2020. However, there has not been a decrease in the need for the services that our program provides. Fortunately, we can continue to serve our communities, we just need to adapt how we do that in order to ensure the health and safety of everyone involved. Here is a simple message that I would encourage you to share with individuals or organizations that we partner with: 

Due to current travel restrictions and safety guidelines, MSU Extension has modified how we work with our clientele. We are still here to provide the information and resources you need, just in different ways than we have in the past.

In the spirit of that message, I am working hard to create volunteer opportunities that MSU Extension Master Gardeners in the Grand Traverse area can engage in while staying home and staying safe. All of these opportunities involve interacting with others only via remote methods such as telephone, online video conferencing, and/or the postal service. 

Lawn and Garden Q&A with MSU Extension Master Gardeners

Every Wednesday from 11am to 1pm, MSU Extension Master Gardeners join me for a live plant diagnostic clinic for local residents via Zoom. You can join just to listen in and learn, or you can help by providing one-on-one diagnostic support to our clients. I would also encourage you to bring your own plant or insect questions to the session. It is easy to join. You can join via internet on your smartphone, tablet, or computer. You can also join by telephone. The link to join by Zoom is: https://msu.zoom.us/j/210151959?pwd=elMwbWp5cDdjMkJHNG03Z0h6ZW84dz09.

If you’d like to join by phone, contact me (waltonn2@msu.edu, 231-256-9888 ext 323) and I will provide you with the phone number and instructions. 

Become a Garden Mentor

I have had requests from a number of local non-profits, schools, and individuals who have an interest in creating vegetable gardens, some of them for the first time, to provide food for those in need in our communities in the Grand Traverse area. To help these enthusiastic new gardeners succeed, I’d like to connect each of them with an MSU Extension Master Gardener Volunteer mentor. The Garden Mentor’s role will be to help them via remote methods (phone, internet, etc) by providing gardening expertise, aid in planning their garden, problem solving, and so on. I have created an online survey tool that will allow me to link MSU Extension Master Gardner Volunteers with these organizations and individuals. The tool will allow you to choose whether you’d prefer to work with schools, individuals, organizations, or all of the above! I will then be able to pair you with an appropriate mentee on an as-needed basis. The link to the survey is here:

https://msu.co1.qualtrics.com/jfe/form/SV_0ONWtPAwuOgoX65

Thank you for reading! I will keep you all updated as new opportunities emerge. Also, please continue to share with me any and all volunteer opportunities or ideas that you might have. I wish you all a safe and happy spring gardening season!


Coordinator’s Corner, March 2020

Coordinator’s Corner: Spring Cleanup That Protects Pollinators

By Nate Walton, MSU Extension Consumer Horticulture Instructor and MG Coordinator

This article is a follow-up to my article about fall cleanup to protect pollinators which you can read in the September 2019 edition of The Real Dirt. 

A pollinator is any animal that moves pollen from one flower of a plant to another flower of the same plant species. In Michigan, our most important pollinators of most native plant species are wild bees. For our insect-pollinated agricultural crops, wild bees contribute to pollination, but most require that large numbers of European honey bees (Apis mellifera) be placed nearby in portable hives.

Honey bee hives placed in a blueberry field for pollination of the crop (N.Walton, MSU Extension). Honey bees are an irreplaceable component of modern agriculture, but you don’t have to worry about them during your spring garden cleanup

Wild bees do not spend the winter in hives, they overwinter in protected locations in a state of hibernation. There are at least 465 species of wild bees living in Michigan and scientists are only beginning

3 native wild bees enjoying the resources provided by this early spring flower (N. Walton, MSU Extension).

to understand where most of them are located in the winter and how we can use that information to protect them. Most wild bees (about 80%) construct their nests in the soil at depths from just a few inches, to as deep as 1 m. The remainder are

called cavity-nesters and they use pithy stems (e.g. elderberry, sumac), hollow stems (wild grasses), or beetle borings in dead trees. For these soil and cavity nesting bees, conservation is a little bit easier because their nest location is also their overwintering location. With some careful observation of the bees in your yard, you should be able to see where they are nesting, make note of it, and protect that area from disturbance. 

Article writing isn’t an effortless occupation. Now you obtain the delights of seeking to outsource expert services wherever your essays are associated. Writing documents is truly a frequent part of pupil existence. Composing an article might be a tricky approach. Each week, pupils should complete several documents and a few re Search documents. Frequently they need to compose an article with essay writing service.

There is probably not much that you need to do differently from your normal spring cleanup routine, to protect the soil nesting bees. On the other hand, if you left ornamental grasses or herbaceous perennial stems unpruned last fall, they may now be harboring cavity nesting bees. When you cut them back this spring, try to allow the stems to remain intact by using sharp tools. Then, you can place them in an out of the way location where the bees will be able to emerge from the nests naturally.

The compost pile is probably not the best place to place plant material that may contain overwintering bees, because there is too much moisture there and the bees may die from pathogen infections. I would recommend having a designated brush pile for all of the material that may be harboring overwintering pollinators. Keep the pile light and airy to prevent moisture accumulation. The timing of your stem cleanup can be somewhat flexible but there are a few important facts to keep in mind. First, the cavity nesting bees will be happiest and healthiest if they are allowed to emerge from the stems while they are still in their natural position (i.e. attached to the crown that they grew from originally). Second, the exact timing of natural emergence depends on the species and climate in your area. And (third) if you wait too long, they will start creating new nests in the stems. Disturbing freshly created nests is much more harmful to the bees than disturbing the bees while they are still in hibernation. Fourth, sometimes the best time to prune is when you have the shears in your hand. 

Another important group of bees that I have not mentioned yet, are one of springtime’s most conspicuous pollinators: Bumble Bees. Bumble bees are social bees, which means that they have a life cycle that includes several generations of workers living together in a communal nest. However, their colonies are started from scratch each spring by solitary queen bees called foundresses. The foundress mated the previous fall and spent the winter in a sheltered location, waiting for her chance to search out a location for her new nest this spring. Scientists actually know very little about where bumble bee queens spend the winter and they would like to know more. If you are interested in helping them out, you can join the Queen Quest citizen science project.

A bumble bee on weeping cherry in April 2017 (N. Walton, MSU Extension)

Anecdotal reports gathered over the years, give us some idea of where you are most likely to encounter bumble bee queens before they break hibernation. They seem to seek out loose litter, such as that you might find under a pine tree or other conifer. Some of them seem to even like burrowing down a few  inches below the soil under the turf in our lawns. They also seem to have a preference for slopes and for locations with an adjacent vertical barrier such a tree, shrub, or building. In other words, they may be in a lot of the areas where you are targeting your spring cleanup activities. It can be quite harmful to disturb hibernating queen bees before it is warm enough for them to fly and/or seek out a new shelter.

This is one of the reasons many advocates of pollinator protection during spring cleanup recommend waiting until the temperature has been consistently over 50 degrees for five days before cleaning up your leaf litter of disturbing a lot of soil in your garden (see “Take a Load Off” by Cheryl Gross in this month’s The Real Dirt). If you do come across an overwintering bumble bee queen during your spring cleanup activities, the best thing to do is to gently return her to where you found her and replace the layer of leaves or duff that had been protecting her. 


Steward – March 2020

Contents (Click on a title or scroll)

Nicotine doesn’t affect my seeds, does it?

Take a load off

Master Gardener Coordinator’s Corner

Nicotine doesn’t affect my seeds, does it?

By Michael O’Brien, Advanced Extension Master Gardener

Now that March is here the ideas are flowing, spring is coming.  Thoughts of what to grow this year are beginning to pop-up in our mind.  Starting plants from seed is fun and economical too. It’s also a fantastic way to teach children.

So the question is, does nicotine really have an effect on seeds?  Yes! If a person was to smoke a cigarette there would be trace amounts of nicotine on their fingers.  And it’s the same for chewing tobacco too. Surprisingly enough, if that same person was to touch seeds, there is a high probability that nicotine would get on the seed.  

In a study done by researchers, they studied the effects of nicotine on the germination of radish, kale, lettuce, wheat, rice, barley and rye seeds.  The results showed the seeds had a very noticeable delay in the rate of germination in all cases. Scientists found that it caused a reduction in the levels of certain enzymes known to be significant in the germination of these seeds.

In the 1950’s researchers started testing the relationship between nicotine, seeds and plants.  They found nicotine can be very affective in killing insects. It was a great discovery, it protected the plant and with the plants being protected it would increase yield production as well.   The goal was to assist farmers so their seeds purchased would have a higher success rate in seed germination. The challenge they were working with was, how to limit or stop insects and funguses from destroying the seed.  The answer was to coat corn seeds as well as other seeds used for mass production with a powder that had nicotine in it. Though the years of using this type product it has now created farmland that is saturated with nicotine.

There was another product created that is still in use today as an insecticidal spray.  This spray is made from derivatives of nicotine. This product is classified as a neonicotinoid.  This spray is designed to over stimulate the nervous system of insects, causing the insect to experience paralysis and death.  Today, there are currently around three hundred different products in this classification. The specific active ingredients include acetamiprid, clothianidin, dinotefuran, imidacloprid, thiacloprid, and thiamethoxam. 

Research has shown the problem with these insecticidal sprays is that they can’t discern between harmful insects and beneficial insects.  Many beneficial insects that are seriously being harmed are bees, ladybugs and Monarch butterflies to name a few. What is so concerning about neonicotinoids is the effects it is having on wildlife that pollinate our crops, its ability to infiltrate groundwater and its cumulative and largely irreversible effects on invertebrates. As practicing gardeners and stewards to the environment, whenever possible we should avoid all products that contain neonicotinoid, to be safe. Gardening pesticide-free is ideal.

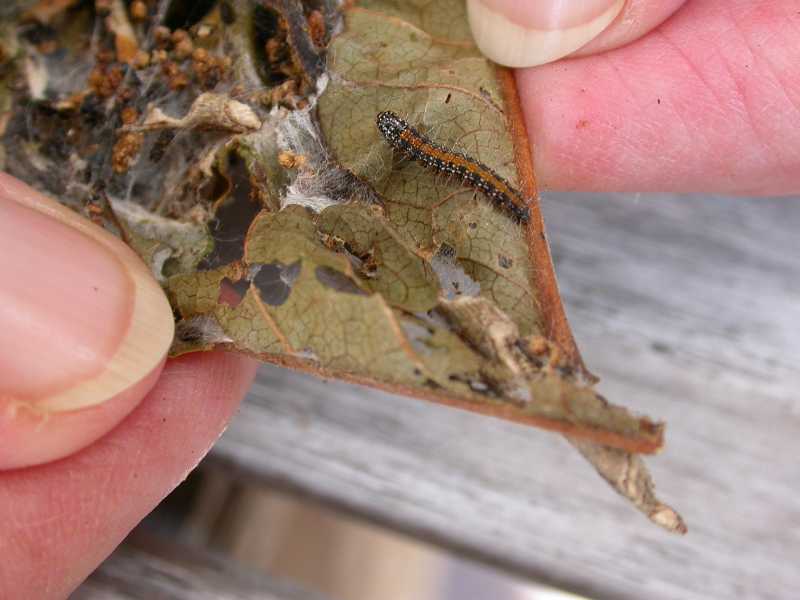
Pawpaw leaf-rolling caterpillar (Lepidoptera), Ompalocera munroei, and webbing in a pawpaw leaf (Asimina triloba). Photo from Missouri Botanical Garden

Take a load off

By Cheryl Gross, Advanced Extension Master Gardener

It is March!  April is around the corner.  With each day of warming gardeners develop a real itch to get into the garden and begin spring clean-up and preparing the soil.  Not so fast, buster. Remember all of the articles and Facebook posts last fall about leaving the leaves to protect insects? Rushing clean-up defeats all of that good thoughtful fall effort.

Some of our wonderful, beautiful, valuable insects overwinter in leaf litter.  The smart gardener knows now to leave the leaf litter where it is to house and protect the eggs, larval forms, and even some adult critters.  Therefore if you have taken the “smart” fall practice, rushing your spring clean-up will ruin all of your good works.

What we know now is that many insects need about 50 degree daytime temperatures to get moving.  This means that you should allow your gardens a minimum of 5 days of nice warm 50 degree weather before you begin to disturb the leaf litter.  

Some may argue, but what about the spring bulbs and early bloomers?  Don’t they need to be uncovered to grow? Not likely. Look at the woodland floor for evidence.  Trillium, Dutchmen’s Breeches, Trout Lily, Celandine Poppy, and more all manage to push though leaf litter with no help from a gardener.  If they can do it, crocus, daffodils, and tulips can do it too. Additionally, leaf litter helps warm the soil slowly without the sun directly beaming on the soil surface.

As for prepping beds for planting, the soil needs to reach at least 55 degrees for successful germination and working wet soil has very bad outcomes ,  including disruption of soil biology and compacting the dirt.

Best gardening practices in northwest lower Michigan in April?  Take a hike, visit a botanic garden, start seeds indoors, and read a good gardening book.  Resist the urge to garden too soon. The short gardening season will still arrive and you will be plenty busy on your knees then.   Until the bugs are out and about from the leaf litter, go ahead and take a load off.


Coordinator’s Corner: Spring Cleanup That Protects Pollinators

By Nate Walton, MSU Extension Consumer Horticulture Instructor and MG Coordinator

This article is a follow-up to my article about fall cleanup to protect pollinators which you can read in the September 2019 edition of The Real Dirt. 

A pollinator is any animal that moves pollen from one flower of a plant to another flower of the same plant species. In Michigan, our most important pollinators of most native plant species are wild bees. For our insect-pollinated agricultural crops, wild bees contribute to pollination, but most require that large numbers of European honey bees (Apis mellifera) be placed nearby in portable hives.

Honey bee hives placed in a blueberry field for pollination of the crop (N.Walton, MSU Extension). Honey bees are an irreplaceable component of modern agriculture, but you don’t have to worry about them during your spring garden cleanup

Wild bees do not spend the winter in hives, they overwinter in protected locations in a state of hibernation. There are at least 465 species of wild bees living in Michigan and scientists are only beginning

3 native wild bees enjoying the resources provided by this early spring flower (N. Walton, MSU Extension).

to understand where most of them are located in the winter and how we can use that information to protect them. Most wild bees (about 80%) construct their nests in the soil at depths from just a few inches, to as deep as 1 m. The remainder are

called cavity-nesters and they use pithy stems (e.g. elderberry, sumac), hollow stems (wild grasses), or beetle borings in dead trees. For these soil and cavity nesting bees, conservation is a little bit easier because their nest location is also their overwintering location. With some careful observation of the bees in your yard, you should be able to see where they are nesting, make note of it, and protect that area from disturbance. 

There is probably not much that you need to do differently from your normal spring cleanup routine, to protect the soil nesting bees. On the other hand, if you left ornamental grasses or herbaceous perennial stems unpruned last fall, they may now be harboring cavity nesting bees. When you cut them back this spring, try to allow the stems to remain intact by using sharp tools. Then, you can place them in an out of the way location where the bees will be able to emerge from the nests naturally.

The compost pile is probably not the best place to place plant material that may contain overwintering bees, because there is too much moisture there and the bees may die from pathogen infections. I would recommend having a designated brush pile for all of the material that may be harboring overwintering pollinators. Keep the pile light and airy to prevent moisture accumulation. The timing of your stem cleanup can be somewhat flexible but there are a few important facts to keep in mind. First, the cavity nesting bees will be happiest and healthiest if they are allowed to emerge from the stems while they are still in their natural position (i.e. attached to the crown that they grew from originally). Second, the exact timing of natural emergence depends on the species and climate in your area. And (third) if you wait too long, they will start creating new nests in the stems. Disturbing freshly created nests is much more harmful to the bees than disturbing the bees while they are still in hibernation. Fourth, sometimes the best time to prune is when you have the shears in your hand. 

Another important group of bees that I have not mentioned yet, are one of springtime’s most conspicuous pollinators: Bumble Bees. Bumble bees are social bees, which means that they have a life cycle that includes several generations of workers living together in a communal nest. However, their colonies are started from scratch each spring by solitary queen bees called foundresses. The foundress mated the previous fall and spent the winter in a sheltered location, waiting for her chance to search out a location for her new nest this spring. Scientists actually know very little about where bumble bee queens spend the winter and they would like to know more. If you are interested in helping them out, you can join the Queen Quest citizen science project (https://www.queenquest.org/about.html).

A bumble bee on weeping cherry in April 2017 (N. Walton, MSU Extension)

Anecdotal reports gathered over the years, give us some idea of where you are most likely to encounter bumble bee queens before they break hibernation. They seem to seek out loose litter, such as that you might find under a pine tree or other conifer. Some of them seem to even like burrowing down a few  inches below the soil under the turf in our lawns. They also seem to have a preference for slopes and for locations with an adjacent vertical barrier such a tree, shrub, or building. In other words, they may be in a lot of the areas where you are targeting your spring cleanup activities. It can be quite harmful to disturb hibernating queen bees before it is warm enough for them to fly and/or seek out a new shelter.

This is one of the reasons many advocates of pollinator protection during spring cleanup recommend waiting until the temperature has been consistently over 50 degrees for five days before cleaning up your leaf litter of disturbing a lot of soil in your garden (see “Take a Load Off” by Cheryl Gross in this month’s The Real Dirt). If you do come across an overwintering bumble bee queen during your spring cleanup activities, the best thing to do is to gently return her to where you found her and replace the layer of leaves or duff that had been protecting her. 


Nourish – March 2020

Contents (Click on a title or scroll)

The Bug Man’s Mother

Houseplants


The Bug Man’s Mother

By Duke Elsner, Ph.D. and Advanced Extension Master Gardener

The year 2019 will always be most memorable for me.  I was able to retire from full-time employment with MSU Extension on January 1.  My wife Gayla and I took a long trip to Oregon and Washington. We became the new superintendents of the Tanner Building at the Northwestern Michigan Fair, in charge of the agriculture, horticulture and floriculture exhibits.

None of these compare with the moments spent with my mother in 2019.  Mom died on October 9, at the amazing old age of 102. It was a rough year for her at times, but she was peaceful and not in pain in the end.  She was still pretty mobile at the start of the year, but a fall in the spring resulted in four broken ribs; she never regained all of her strength after that trauma.  

Gayla and I visited her a lot during the year, as did many other relatives.  She would often reminisce about the family farm she grew up on, in southwest Michigan; memories of her youth were clearer to her than those from her grown-up days.  We tried to take her to our house on most weekends so she could get out of her nursing home room and see trees, flowers, and other people.

Dan and Gustie (Rohde) Graber with children, L-R: Hattie, Theresa, Henry, Adolph, and Dan Gra(e)ber. Eden Springs (House of David), Benton Harbor, Michigan 1919. Photo provided by Dr. Duke Elsner, PhD

On most trips she would remark about how many trees there still were in our area.  “I guess my father didn’t cut all of them down,” was a common comment; her father worked on a lumbering crew in northern Michigan for five years before returning to Russia to marry his sweetheart. They immigrated to the United States in 1912, with two sons. 

Mom came along in 1917, their fifth child (the cute little one in the middle).  She was a tomboy, likely to be found playing baseball with her brothers, walking on the high beams of the barn, or working just as hard as any of them on farm chores.  She survived having tuberculosis before there were antibiotics to treat it. In addition to farm work, the family put a lot of effort into gardening.  

Photo by Dr. Duke Elsner, PhD

Her mother had a large rose garden with many other perennials and annual flowers, and numerous flowering trees and shrubs.  My mother and her brothers helped care for the gardens and landscape after my grandmother got too old to do it.  

Mom married Edward Elsner in 1940 and they moved into a small house in Benton Harbor.  Three sons later, they decided to move to a larger property in the country. She helped design their new house, making sure it abounded in casual comfort and good views of future gardens.  I came along in 1956 when mom was 39. At this time my family raised pickles and red currants as commercial crops, and sweet corn, potatoes and tomatoes for personal use. On the ornamental side, mom specialized in roses, lilacs, peonies, dahlias and bulb flowers.

Photo by Dr. Duke Elsner, PhD

Her mother and one brother continued to live on the old family farm until 1977.  I spent most of my summer days on that farm, working in the orchards, fields and garden.  People often ask me how I became interested in insects. It started by being surrounded by gardens, shrubs, trees and agricultural crops, both at home and on the old farm.  It was very easy to see both the beauty and importance of insects, and my mother never discouraged me from handling them, using her plants to feed them, or keeping a few live ones in the refrigerator.


Photo by Dr. Duke Elsner, PhD

After I left home, mom and dad planted many trees on their property, turning it into a woodlot.  Gardening efforts declined as they aged, but never ceased.  After dad died in 2005, mom continued to live in her home for almost another decade.  She was still mowing her own lawn at age 90! In early 2014 she broke her foot and we had the perfect excuse to pry her out of her house and move her to an assisted living facility in Traverse City.

We added a ramp to our house so she could roll her walker to our front door.  Of course, it needed a row of window boxes to spruce it up a bit. That’s mom, going on 100, helping with the work.  

Duke Elsner, Ph.D., learned as many important things about gardens and landscapes from his mother as he did from universities.  Mom gardened with a few simple guidelines that are still good to consider.   

If it requires a lot of work, that’s OK, you get a lot in return. 

If it requires a lot of spraying, it isn’t worth growing.  

Grow more than you need and give it to those who do need it.  

Give free plants, cuttings, seeds, etc. to anybody that wants some. 

I’m very proud to have many daylilies, peonies, phlox, roses and lilacs in my garden that came from my mother’s garden.  A few of the roses can be traced back to the old farm. Now it’s my job to make sure they outlive me. Fortunately, I had a great teacher for the last 60 years.

Houseplants

By Nancy Larson, Advanced Extension Master Gardener

Did anyone receive a holiday plant gift?  What a really thoughtful gift—and now—you have to care for it.  Holiday gifts such as Poinsettias, Amaryllis, or succulents all require different treatment.  Whether received as holiday gifts (lucky you!) or have been in your collection for years, houseplants deserve special treatment through the dry winter season. I’ve also received plants as a holiday gift and wanted to offer some tips I’ve learned to help you maintain healthy houseplants.

First, you need to know that plants should be segregated.  Moisture loving plants vs drier plants. Watering a cacti weekly would turn it to rot pretty quickly. A Boston fern needs more frequent watering than succulents or cacti do. In addition, some plants like violets and orchids, like to sit on plates with stones, pebbles or marbles that are kept wet.  They like the evaporated moisture. Please bear this in mind when following the tips:

  1. Practice smart watering.  Humidity in homes can vary greatly in winter depending on the coldness of the outside air forcing our heat to work and dry our inside air,  whether we humidify, how many people live in the house, etc. Check your gift plant’s soil for moisture.  Push your finger down and into the soil.  In many cases, if one inch is dry it’s time to water. However, this is not necessarily true with suculents such as sansaveria and jade. They need to be bone dry before watering.  Alternatively, fern and poinsettia will wilt if their soil is bone dry.  Although, if water seeps around your finger when you check the soil, then it needs to dry out. You should wait a week and check again. Inside, we don’t have our automatic trickle or spray watering systems so it is imperative to check on your house plants for moisture needs regularly.
  2. Check the plant for its health.  Remove any damaged, spotted, yellowed leaves.  Off-colored leaves can be a symptom of many things such as root problems, too much fertilizer or even too much water. House plants like to rest in the winter months so require little fertilization, except for orchids and forced bulbs which may need a diluted portion.  Come spring, give your house plants a bit of organic plant food as the daylight hours increase.
  3. If you are lucky to get a plant label/tag with it, READ IT! It could have helpful tips for watering, sun exposure, and placement.  If you don’t have a label/tag, check the internet for sources regarding how to care for your plant.  YouTube has some helpful videos for plant care, but be sure the source is reputable.
  4. Remove any floral wrappings.  They are decorative and look nice, but they cover the hole in the bottom of the plant container which keeps the plant from properly draining, and breathing. ALWAYS put your pots on a saucer or decorative bowl.  You don’t want to ruin your tables with a water ring from the plant pots moisture.
  5. Location!  Location! Location! A south or east facing window brings in good light.  Avoid placing your plant near fireplaces or by forced air heat vents, as that causes dryness and withering.  Watch for signs. If you choose a location and in a week or two the plant is drooping, move it, it’s telling you it doesn’t like it there.

Remember we often kill our plants with kindness, thinking that watering them often is loving them. Don’t overwater. 

Enjoy your inside plants!


Beautify – March 2020

Contents (Click on a title or scroll)

What is a plant runner, stolon and a rhizome?

Create New Plants from runners, stolons, and rhizomes

What is a plant runner, stolon and a rhizome?

By Michael O’Brien, Advanced Extension Master Gardener

A plant runner is usually a horizontal long thin stem that grows outward from the mother plant.  The long stem creates widely spaced new shoots, which can then become new plants.  If the runner grows underground it is called a rhizome. Although it is underground, like most plant roots, a rhizome is not a type of root, as roots do not grow shoots.  Many different types of grasses grow rhizomes.  If the runner grows leaves and has photosynthesizing abilities it is called a stolon.  If the runner is not a stolon it must remain attached to the mother plant.  The runners develop roots to become a new daughter plant and, when it is old enough, it will develop runners of its own.  A plant that creates runners can quickly spread over a wide area and can choke out other plants.

So, what’s are the benefit to a plant that develops runners?  These plants don’t have to create large amounts of energy to develop seeds, though it doesn’t mean they won’t create seeds too.  A well-known example of a plant that develops runners is a strawberry plant, Fragaria × ananassa. A mother plant will develop runners and those runners will continue to grow.  As that runner is growing, new daughter plants are developing. The daughter plants will be an exact replica of the mother plant. The mother plant will also produce fruit and the seeds will then grow on the fruit.  Another example is the Spider plant, Chlorophytum comosum. The Spider plant creates daughter plants and flowers. These flowers, when pollinated, will develop a seed pod though no edible fruit.    

A good example of a plant that grows stolons is the Boston fern, Nephrolepis exaltata.  The Boston fern will develop a stolon and several new daughter plants. Again the daughter plants are identical to the mother plant.  However, if the stolon breaks off the mother plant the stolon can continue to grow which will continue to produce more daughter plants.  Ferns, in general, grow stolons.

If the rhizome is broken from the mother plant, it can continue to grow.  This type of plant can become a real problem when tending a garden. Each broken piece of the rhizome can continue to grow until the garden is filled with this plant, can be referred to as a weed.   

This picture shows a Longhorn Sumac, Rhus typhina, growing many daughter plants.  It’s easy to see how this can quickly become a problem in a garden.

Image from sciencelearn.org

Create New Plants from runners, stolons, and rhizomes

Michael O’Brien, Advanced Extension Master Gardener

In the previous article about runners, stolons and rhizomes, if these plant parts are left to their own they will quickly take over a large area.  In the same respect these three characteristics create an opportunity to make new plants that can grow in places where they are desirable.  

With runners, a few daughter plants are growing on a long stem of the mother plant. As these daughter plants are starting out, their roots are not developed enough to grow independently of the mother.  If runners are in the garden, place soil on the runners and around any daughter plants and lightly water regularly to encourage growth. When the daughter plant begins to grow vigorously, it will develop an independent root system from the mother plant. When the daughter plant grows a strong, healthy root system, the runner will die.  At this time the daughter plant can be gently dug up and replanted in a desirable spot in the garden.  

Otherwise, take a small planter and fill it with potting soil.  Dig a hole in the ground near the daughter plant. Insert the planter in the newly dug hole and lay the daughter plant on top of the potting soil in the planter.  Place soil on the runner and around the daughter plant to anchor it in place.  Water gently and frequently.  When the runner dies off, the planter can be dug up with the daughter plant. It is now growing independently of the mother plant and is well established.

Also in the previous article, I talked about the Spider plant, Chlorophytum comosum.  The Spider plant is a fun plant to experiment with different types of rooting techniques. When selecting a daughter plant, choose one that has some root nubs on the bottom of the plant.  Cut the daughter with a section of the runner. The remaining nutrients in the runner will help to feed the daughter plant while it’s alive so make the cutting long enough to help the new plant.  Using a small planter filled with potting soil, place the daughter plant on top soil and lightly push it into the dry soft soil. Make sure the root nubs make good contact with the soil. Lightly water the soil: never drench the soil with water.  Keep in lightly lit area.

There is another technique that can be used with water.  Select the daughter plant with root nubs. This time the runner is cut as close to the daughter plant as possible without hurting the plant.  Using a small cup fill about 1/3 of the cup with water. Place the daughter plant in the cup, the water should be just touching the root nubs.  Check daily because the water will evaporate quickly, especially when the roots begin to develop. Using a nutrient solution instead of water can quicken root development.  The nutrient being mixed with water should have a ratio of 10-0-0. That is the N,P,K ratio that shows on the nutrient label. An educational experiment for kids to see root development.  A cotton ball can also be put in the bottom of the cup with the daughter plant sitting on top of it. The cotton ball wicks the water right to the root zone while creating enough air too.

Stolons are a little different in regards to creating new plants.  Stolons can break off the mother plant and remain alive. Usually daughter plants have no roots but stolons do.  As mentioned previously with runners, stolons can be buried with soil surrounding the daughter plant. Water gently and frequently.  When the daughter plant is growing vigorously it is now safe to transplant. Keep in mind the stolon is still alive. It is important to cut the daughter plant off the stolon before moving this plant.

The Boston fern, Nephrolepis exaltata, was also mentioned in the previous article.  The Boston fern has long stolons hanging down the plant. The daughter plant doesn’t have any roots at this time.  Gently cut a piece of the stolon along with a daughter plant. Lay the bottom of the daughter plant on top of some lightly moistened, never wet, potting soil. Moistened soil has a nice balance of water and air which entices the plant to grow roots.  Place some moss, it can be sphagnum moss, around the plant to hold it in place. Give the new plant a very small amounts of water weekly and keep it in cool lightly lit area. When the new plant begins growing new shoots, roots will be growing too.  In roughly a month’s time this plant can be transplanted to its new location. 

Working with rhizomes is a little bit different.  While looking at the garden it is easy to see a string of young daughters growing out of the ground.  Using the picture from the previous article, the plant growing in the picture is a Longhorn Sumac, Rhus typhina with daughter plants.  Begin by gentle loosening the soil to avoid damaging too many roots. Once the rhizome is exposed and loosened from the soil, cut the rhizome before and after the daughter plant.  Make sure the daughter plant has roots. Replant the daughter plant in its new location in the garden or in a planter with potting soil. If the daughter plant is put in a planter, be sure to water it well enough to get the air out of the soil.  If there is too much air in the soil the roots will dry out and the plant will die. The planter should have drain holes to allow excess water to drain out. If the daughter plant is planted in the garden, then water well after it has been planted.  The new plant should be lightly shaded to avoid stress.


Steward – January 2020

What do i do with that tree?

Below are three options for Christmas tree disposal in the Grand Traverse County area. While this list is by no means exhaustive, the programs mentioned are supported by MGANM. 

  1. Traverse City Parks and Recreation Department:

    “The Parks and Recreation Division offers a Christmas Tree drop off site for City residents. The trees are chipped and used for trail surfacing for City parks and Brown Bridge Quiet Area, mulching material and erosion control.

    Trees can be brought to the boat launch parking lot at Hull Park at the west end of Hannah Street, just west of Woodmere Avenue beginning December 26, 2019 and will run through Sunday, January 19, 2020.

    There is no charge for this service. Please do not leave trees in the alleys, streets or City parks. The City will not be collecting them there.”

  2. Norte:
    Live in Traverse City but can’t get your tree to Hull Park? Norte is here to help. For a $25 donation, they will pick up your tree at your doorstep, load it on their bicycle  trailer, and take it to Hull Park for you.

  3. Inhabitect, LLC

“Inhabitect, LLC is passionate about designing, building and growing resilient and ecologically mindful landscapes. One aspect of this mission is to utilize materials that are readily available, that are sourced as locally as possible, to meet the needs of our projects. This is why we have planned our 1st Annual Christmas Tree Drop-off at the Elmwood Township Park.

There is no charge to drop off your tree. Our first event is Sunday, January 5th, 2020, from 11am until 3pm, at the Elmwood Township Park in Greilickville, just outside of Traverse City. Additional drop off opportunities may be added, follow the Inhabitect FB page for updates. Be sure to remove all decorations, including lights, artificial snow, ornaments, and tinsel, from the Christmas trees, Inhabitect will not accept any trees that contain these items or are (sic) otherwise been treated with harmful chemicals.”

3. Grand Traverse Regional Land Conservancy

“Want to dispose of your Christmas tree and help GTRLC’s invasive species fighting goat herd at the same time? Conifers are packed with vitamin C and other essential nutrients, making them a great addition to our herd’s winter diet. We’re asking folks to donate their trees (free from decorations or chemicals, please). Pick a time and location listed below. Look for signs and a trailer with trees.

We (and the goats) thank you!”


Master Gardener Coordinator’s Corner

The Volunteer Selection Process (VSP) for EMGs and a new location for this spring’s EMG training program!

By, Nate Walton MSUE Master Gardener Coordinator and Consumer Horticulture Program Instructor

I am happy to announce that this year’s (2020) MSU Extension Master Gardener training program is moving to be a little bit closer to Traverse City. We distributed an online survey this fall to find out where our pool of prospective trainees would prefer to hold the class this year and there was overwhelming support for a Traverse City location. I was able to reserve an event space at the Grand Traverse Regional Arts Campus (Leelanau Studios), which is located just north of TC at the intersection of Cherry Bend Rd. and M-22 in Elmwood Township. The classes will begin on Thursday March 5th and will continue every Thursday from 4 – 8 pm through June 14th.

Registration is open for this spring’s training program so please help to spread the word! The deadline to pay by check is February 11th and the volunteer application must be completed by February 21st so there is no time to waste. As you may be aware, the process to become an MSU Extension Master Gardener volunteer has changed in the last few years and these changes mean that prospective trainees have to begin the application process earlier than ever. When talking to potential applicants, I would recommend emphasizing that the program is first and foremost a volunteer service program. Extension Master Gardeners are trained to be out in Michigan’s communities, leading, teaching, and gardening alongside Michigan residents of all ages and all walks of life. Sometimes, this means working with vulnerable populations. To protect these people we serve, it is extremely important that all our MSU Extension Master Gardener Volunteers pass through a vetting or screening process. For Extension Master Gardener volunteers, the screening or Volunteer Selection Process (VSP) consists of 3 main components:

  1. An electronic application, which is completed on a secure MSU Extension website. The application will include consent to background checks (national and state) and Sex Offender Registry checks. 
  2. References. The online application requires that you provide the names of 5 references (friends, EMGs, co-workers, etc.). 
  3. A face-to-face interview with a trained MSU Extension staff member (most likely with yours truly, Nate Walton). The volunteer interview is an opportunity, in a casual setting, for you and your EMG coordinator to learn more about you, your volunteer interests, and expectations of the program. 

There is also an abundance of information on the MSU Events registration page for the class, which is located here: https://events.anr.msu.edu/mgvptraversecity20/

Starting in 2020, all currently certified EMG volunteers will be asked to complete the VSP as well. For certified EMGs who have not already completed the VSP, the process will be an abbreviated version of the process described above, but is essentially the same. The exact timeline for EMGs to begin the process is not yet determined, but you will be invited by email when it is time for you to begin the VSP. Let me know if you have any questions about the training program or the VSP. I can be reached at waltonn2@msu.edu or 231-256-9888 (x323). We know how important your volunteer work is and we hope this process will improve the impact of that work. Your feedback and participation as always, is greatly appreciated!


Generic selectors
Exact matches only
Search in title
Search in content
Post Type Selectors
Filter by Categories
Administration
Archive News
Beautify
Coordinator's Corner
Integrated Pest Management
News & Events
Nourish
Real Dirt
Serve
Steward
Upcoming Events
Volunteer Projects

Michigan Gardening Hotline

9am to Noon, M-F Year round
Also 1pm-4pm in Spring/Summer


MSU EXTENSION ASK AN EXPERT

Ask an Expert


Log Your Hours